📫 Neverest CLI
CLI to synchronize, backup and restore emails, based on email-lib.
The project is under active development, do not use in production before the final v1.0.0 (or at least do some backups).
Features
- Backends configuration via interactive wizard.
- Sync pairs of backend together (IMAP, Maildir and Notmuch supported).
- Partial sync based on filters (folder name, envelope date).
- Restricted sync based on permissions (create/delete folder, update flag, create/update message).
- Backup and restore emails using the Maildir backend.
Coming soon:
- POP, JMAP and mbox support.
- Editing configuration via wizard.
- Native backup and restore support.
Sponsoring

Special thanks to the NLnet foundation and the European Commission that helped the project to receive financial support from:
- NGI Assure in 2022
- NGI Zero Entrust in 2023
If you appreciate the project, feel free to donate using one of the following providers:
Installation
Prebuilt binary
Neverest CLI can be installed with a prebuilt binary:
# As root:
$ curl -sSL https://git.sr.ht/~soywod/neverest-cli/blob/master/install.sh | sudo sh

# As a regular user:
$ curl -sSL https://git.sr.ht/~soywod/neverest-cli/blob/master/install.sh | PREFIX=~/.local sh
Those commands install the latest binary from the GitHub releases section.
Note: Linux, MacOS and Windows are supported. Note that some features may not work as expected on Windows.
Cargo
Neverest CLI can be installed with cargo:
$ cargo install neverest
You can also use the git repository for a more up-to-date (but less stable) version:
$ cargo install --git https://git.sr.ht/~soywod/neverest-cli neverest
Neverest CLI comes with few default features:
imap: enables IMAP backendmaildir: enables Maildir backendwizard: enables the wizard configurator with IMAP auto discovery
There is also optional features:
notmuch: enables notmuch backend (requires the notmuch lib to be installed on the system)
Nix
Neverest CLI can be installed with Nix:
$ nix-env -i neverest
You can also use the git repository for a more up-to-date (but less stable) version:
$ nix-env -if https://github.com/soywod/neverest/archive/master.tar.gz

# or, from within the source tree checkout
$ nix-env -if .
If you have the Flakes feature enabled:
$ nix profile install neverest

# or, from within the source tree checkout
$ nix profile install

# you can also run Neverest directly without installing it:
$ nix run neverest
Development
To enter a development shell:
$ nix-shell

# or, with the Flakes feature enabled
$ nix develop
From here, you have access to all the development tools (Rust compiler, cargo, rust language server, code formatter…) necessary to hack on Neverest.
If you use VSCode, simply open this project folder and accept the workspace extension recommendations.
Sources
Neverest CLI can be installed from sources.
First you need to install the Rust development environment (see the rust installation documentation):
$ curl https://sh.rustup.rs -sSf | sh
Then, you need to clone the repository and install dependencies:
$ git clone https://git.sr.ht/~soywod/neverest-cli neverest
$ cd neverest
$ cargo check
Now, you can build Neverest:
$ cargo build --release
Note: binaries are available in the target/release folder.
Troubleshooting
Could not compile autocfg
On aarch64, compiling autocfg will exhaust all available memory and rustcc will be killed by OS. You need to update llvm-libs to the latest version to solve this problem. This is a llvm bug.
Configuration
Neverest CLI takes its TOML configuration from one of those paths:
$XDG_CONFIG_HOME/neverest/config.toml$HOME/.config/neverest/config.toml$HOME/.neverestrc
There is 2 ways to configure Neverest CLI:
Automatically, using the wizard
You just need to run neverest. You can configure separated files using the -c|--config argument, for example: neverest -c /tmp/config.toml.
Note: actually you can only create new configurations with the wizard. There is an opened issue #42 to edit existing configurations using the wizard.
Manually, by editing the TOML file
The main section of the configuration file is accounts: it contains all the configurations of your accounts.
An account is a backend tuple (left and right) identified by an [arg::name] that needs to be synchronized. The synchronization can be [config]ured by the user.
The file should first contain your global configuration, followed by your accounts configurations. Each account configuration should be located inside a TOML section (table). The table name should be unique, as it is used to identify an account:
[accounts.example1]
# account config

[accounts.example2]
# account config

# …
Account configuration
An account is composed of a left and a right backend configuration.
default
The defaultness of the current account.
When synchronizing, if no account name is explicitly given, this one will be used by default.
[accounts.example]
default = true
folder.filters
Filter folders to synchronize, for both left and right backends.
[accounts.example]
folder.filters = "all" # include all folders (default)
folder.filters.include = ["INBOX", "Sent"]
folder.filters.exclude = ["All Mails"]
envelope.filters
Filter envelopes to synchronize, for both left and right backends.
Only date filters are available for now.
[accounts.example]
envelope.filters.before = "1990-12-31"
envelope.filters.after = "1990-12-31"
left|right.backend
The configuration of the left and/or right backend.
The left backend can be seen as the source, and the right backend the target, except that there is not implicit difference between source and target. Hence left and right are used instead.
Supported backends: imap, maildir and notmuch.
left|right.folder.aliases
Define custom folder aliases.
Aliases are useful when you need to map a left folder with a right one (or vice versa).
[accounts.example]
left.folder.aliases.drafts = "Brouillons"
right.folder.aliases.drafts = "[Gmail]/Drafts"
left|right.folder.permissions
Control whenever left/right backend can create or delete folders.
[accounts.example]
left.folder.permissions.create = true
right.folder.permissions.delete = false
left|right.flag.permissions
Control whenever left/right backend can change flags.
[accounts.example]
left.flag.permissions.update = false
left|right.message.permissions
Control whenever left/right backend can create or delete messages.
[accounts.example]
left.message.permissions.create = true
right.message.permissions.delete = false
Example
Here a complete and documented config.sample.toml that you can actually test yourself with the following commands:
# save the sample config locally
curl https://raw.githubusercontent.com/soywod/neverest/master/config.sample.toml > config.sample.toml

# spawn a testing IMAP/SMTP server using docker
docker run -it --rm -p 3025:3025 -p 3110:3110 -p 3143:3143 -p 3465:3465 -p 3993:3993 -p 3995:3995 -e GREENMAIL_OPTS='-Dgreenmail.setup.test.all -Dgreenmail.hostname=0.0.0.0 -Dgreenmail.auth.disabled -Dgreenmail.verbose' greenmail/standalone:latest

# test the CLI using the sample config
neverest -c ./config.sample.toml sync
[accounts.example]
# The current `example` account will be used by default.
default = true

# Filter folders according to the given rules.
#
# folder.filter.include = ["INBOX", "Sent"]
# folder.filter.exclude = ["All Mails"]
folder.filter = "all"

# Filter envelopes according to the given rules.
#
# envelope.filter.before = "1990-12-31T23:59:60Z"
# envelope.filter.after = "1990-12-31T23:59:60Z"

# The left backend configuration.
#
# In this example, the left side acts as our local cache.
left.backend.type = "maildir"
left.backend.root-dir = "/tmp/example"

# The left backend permissions.
#
# Example of a full permissive backend (default behaviour):
left.folder.permissions.create = true
left.folder.permissions.delete = true
left.flag.permissions.update = true
left.message.permissions.create = true
left.message.permissions.delete = true

# The right backend configuration.
#
# In this example, the right side acts as our remote.
right.backend.type = "imap"
right.backend.host = "localhost"
right.backend.port = 3143
right.backend.login = "example@localhost"

# The right backend password.
#
# right.backend.passwd.cmd = "echo password"
# right.backend.passwd.keyring = "password-keyring-entry"
right.backend.passwd.raw = "password"

# The right backend encryption.
#
# right.backend.encryption = "tls" # or true
# right.backend.encryption = "start-tls"
right.backend.encryption = "none" # or false

# The right backend permissions.
#
# In this example, we set up safe permissions by denying deletions
# remote side.
right.folder.permissions.delete = false
right.message.permissions.delete = false
IMAP configuration
left|right.backend.type (required)
[accounts.example]
left.backend.type = "imap"
left|right.backend.host (required)
The IMAP server hostname.
[accounts.example]
right.backend.type = "imap"
right.backend.host = "localhost"
left|right.backend.port (required)
The IMAP server port.
[accounts.example]
left.backend.type = "imap"
left.backend.port = 3143
left|right.backend.encryption
The IMAP encryption protocol to use.
-
left|right.backend.encryption = "tls" | true(default): use required encryption (SSL/TLS). -
left|right.backend.encryption = "start-tls": use opportunistic encryption (StartTLS). -
left|right.backend.encryption = "none" | false: do not use any encryption.
[accounts.example]
right.backend.type = "imap"
right.backend.encryption = "tls"
left|right.backend.login (required)
The IMAP account login.
[accounts.example]
right.backend.type = "imap"
right.backend.login = "example@localhost"
left|right.backend.passwd|oauth2 (required)
The IMAP account authentication mechanism.
left|right.backend.passwd
Regular password authentication.
-
left|right.backend.passwd.raw: Raw password (unsafe, not recommanded). [string] -
left|right.backend.passwd.cmd: Password retrieved from the given shell command. [string] -
left|right.backend.passwd.keyring: Password retrieved from your system’s default password manager at the given entry. [string]
left|right.backend.oauth2
OAuth 2.0 authorization mechanism.
-
left|right.backend.oauth2.client-id(required): Client identifier issued to the client during the registration process described by Section 2.2. [string] -
left|right.backend.oauth2.auth-url(required): URL of the authorization server’s authorization endpoint. [string] -
left|right.backend.oauth2.token-url(required): URL of the authorization server’s token endpoint. [string] -
left|right.backend.oauth2.method: OAuth 2.0 authentication method. Default:XOAUTH. [XOAUTH|OAUTHBEARER] -
left|right.backend.oauth2.client-secret: Override how the client secret is retrieved:-
left|right.backend.oauth2.client-secret.raw: Raw client secret (unsafe, not recommanded). [string] -
left|right.backend.oauth2.client-secret.cmd: Client secret retrieved from the given shell command. [string] -
left|right.backend.oauth2.client-secret.keyring: Client secret retrieved from your system’s default password manager at the given entry. [string]
If omitted, the client secret is retrieves from your system’s default password manager at the entry
<account-name>-left|right.backend.oauth2-client-secret. -
-
left|right.backend.oauth2.access-token: Override how the access token is retrieved:-
left|right.backend.oauth2.access-token.raw: Raw access token (for debugging purpose). [string] -
left|right.backend.oauth2.access-token.cmd: Access token retrieved from the given shell command. [string] -
left|right.backend.oauth2.access-token.keyring: Access token retrieved from your system’s default password manager at the given entry. [string]
If omitted, the access token is retrieves from your system’s default password manager at the entry
<account-name>-left|right.backend.oauth2-access-token. -
-
left|right.backend.oauth2.refresh-token: Override how the refresh token is retrieved:-
left|right.backend.oauth2.refresh-token.raw: Raw refresh token (for debugging purpose). [string] -
left|right.backend.oauth2.refresh-token.cmd: Refresh token retrieved from the given shell command. [string] -
left|right.backend.oauth2.refresh-token.keyring: Refresh token retrieved from your system’s default password manager at the given entry. [string]
If omitted, the refresh token is retrieves from your system’s default password manager at the entry
<account-name>-left|right.backend.oauth2-refresh-token. -
-
left|right.backend.oauth2.pkce: Enable the Proof Key of Code Exchange. [bool] -
left|right.backend.oauth2.scope: Access token scope, as defined by the authorization server. Variants possible:-
left|right.backend.oauth2.scope: One scope. [string] -
left|right.backend.oauth2.scopes: One or more scopes. [list[string]]
-
Examples
left.backend.type = "imap"
left.backend.host = "localhost"
left.backend.port = 3143
left.backend.encryption = false
left.backend.login = "example@localhost"
left.backend.passwd.raw = "password"
right.backend = "imap"
right.backend.host = "localhost"
right.backend.port = 993
right.backend.login = "example@localhost"
right.backend.oauth2.client-id = "my-oauth2-client-id"
right.backend.oauth2.auth-url = "http://localhost/oauth2/auth"
right.backend.oauth2.token-url = "http://localhost/oauth2/token"
right.backend.oauth2.pkce = true
right.backend.oauth2.scope = "all"
right.backend.encryption = "tls"
Maildir configuration
left|right.backend.type (required)
[accounts.example]
left.backend.type = "maildir"
left|right.backend.root-dir (required)
The Maildir root directory.
The path should point to the root level of the Maildir directory (the one containing the cur, new and tmp folders). Path is shell-expanded, which means environment variables and tilde ~ are replaced by their values.
[accounts.example]
right.backend.type = "maildir"
right.backend.root-dir = "~/.Mail/example"
Notmuch configuration
To activate this backend, you need to:
- Compile neverest from sources with the notmuch feature enabled:
$ cargo install --features notmuch neverest
- Have the
libnotmuchavailable on your system.
left|right.backend.type (required)
[accounts.example]
left.backend.type = "notmuch"
left|right.backend.database-path
The path to the Notmuch database.
The path should point to the root directory containing the Notmuch database (usually the root Maildir directory). Path is shell-expanded, which means environment variables and tilde ~ are replaced by their values. Defaults to the default Notmuch database location if omitted.
left|right.backend.maildir-path
Override the default path to the Maildir folder.
Path is shell-expanded, which means environment variables and tilde ~ are replaced by their values. Defaults to database_path if omitted.
left|right.backend.config-path
Override the default Notmuch configuration file path.
Path is shell-expanded, which means environment variables and tilde ~ are replaced by their values.
left|right.backend.profile
Override the default Notmuch profile name.
Gmail configuration
Google passwords cannot be used directly. There is two ways to authenticate yourself:
Using App Passwords
This option is the simplest and the fastest. First, be sure that:
- IMAP is enabled
- Two-step authentication is enabled
- Less secure app access is enabled
First create a dedicated password for Neverest.
[accounts.gmail]
folder.filter.exclude = ["All Mail"]

left.backend.type = "maildir"
left.backend.root-dir = "~/Mail/gmail"

right.backend.type = "imap"
right.backend.host = "imap.gmail.com"
right.backend.port = 993
right.backend.login = "clement.douin@gmail.com"
Running neverest configure -a gmail will ask for your IMAP password, just paste the one generated previously.
See the IMAP section for other way of managing your generated password.
Using OAuth 2.0
This option is the most secure but the hardest to configure. First, you need to get your OAuth 2.0 credentials by following this guide. Once you get your client id and your client secret, you can configure your Neverest account this way:
[accounts.gmail]
folder.filter.exclude = ["All Mail"]

left.backend.type = "maildir"
left.backend.root-dir = "~/Mail/gmail"

right.backend.type = "imap"
right.backend.host = "imap.gmail.com"
right.backend.port = 993
right.backend.login = "clement.douin@gmail.com"
right.backend.oauth2.client-id = "<client-id>"
right.backend.oauth2.auth-url = "https://accounts.google.com/o/oauth2/v2/auth"
right.backend.oauth2.token-url = "https://www.googleapis.com/oauth2/v3/token"
right.backend.oauth2.pkce = true
right.backend.oauth2.scope = "https://mail.google.com/"
Running neverest configure -a gmail will complete your OAuth 2.0 setup and ask for your client secret.
Outlook configuration
[accounts.outlook]
left.backend.type = "maildir"
left.backend.root-dir = "~/Mail/outlook"

right.backend.type = "imap"
right.backend.host = "outlook.office365.com"
right.backend.port = 993
right.backend.login = "clement.douin@outlook.com"
Running neverest configure -a outlook will ask for your IMAP password.
See the IMAP section for other way of managing your password.
Using OAuth 2.0
This option is the most secure but the hardest to configure. First, you need to get your OAuth 2.0 credentials by following this guide. Once you get your client id and your client secret, you can configure your Neverest account this way:
[accounts.outlook]
left.backend.type = "maildir"
left.backend.root-dir = "~/Mail/outlook"

right.backend.type = "imap"
right.backend.host = "outlook.office365.com"
right.backend.port = 993
right.backend.login = "clement.douin@outlook.com"
right.backend.oauth2.client-id = "<client-id>"
right.backend.oauth2.auth-url = "https://login.microsoftonline.com/common/oauth2/v2.0/authorize"
right.backend.oauth2.token-url = "https://login.microsoftonline.com/common/oauth2/v2.0/token"
right.backend.oauth2.pkce = true
right.backend.oauth2.scopes = [
  "offline_access",
  "https://outlook.office.com/IMAP.AccessAsUser.All",
]
Running neverest configure -a outlook will complete your OAuth 2.0 setup and ask for your client secret.
iCloud Mail configuration
From the iCloud Mail support page:
- IMAP port =
993. - IMAP login = name of your iCloud Mail email address (for example,
johnappleseed, notjohnappleseed@icloud.com) - SMTP port =
587withSTARTTLS - SMTP login = full iCloud Mail email address (for example,
johnappleseed@icloud.com, notjohnappleseed)
[accounts.icloud]
left.backend.type = "maildir"
left.backend.root-dir = "~/Mail/icloud"

right.backend.type = "imap"
right.backend.host = "imap.mail.me.com"
right.backend.port = 993
right.backend.login = "johnappleseed"
Running neverest configure -a icloud will ask for your IMAP password.
Usage
$ neverest [OPTIONS] <COMMAND>
Commands
doctor: check up the state of the given accountconfigure: configure the given account (prompt keyring passwords)sync: synchronize the given accountman: generate manual pages for themancommandcompletion: generate completion script for the given shell
Options
These options are global, which means they can be used in all commands and subcommands.
-c|--config
Override the default configuration file path.
The given paths are shell-expanded then canonicalized (if applicable). If the first path does not point to a valid file, the wizard will propose to assist you in the creation of the configuration file. Other paths are merged with the first one, which allows you to separate your public config from your private(s) one(s).
-o|--output
Customize the output format
The output format determine how to display commands output to the terminal. The possible values are:
json: output will be in a form of a JSON-compatible objectplain: output will be in a form of either a plain text or table, depending on the command
-C|--color
Control when to use colors
The default setting is ‘auto’, which means neverest will try to guess when to use colors. For example, if neverest is printing to a terminal, then it will use colors, but if it is redirected to a file or a pipe, then it will suppress color output. neverest will suppress color output in some other circumstances as well. For example, if the $TERM environment variable is not set or set to dumb, then neverest will not use colors.
The possible values are:
never: colors will never be usedalways: colors will always be used regardless of where output is sentansi: like ‘always’, but emits ANSI escapes (even in a Windows console)auto: neverest tries to be smart
--debug
Enable logs with spantrace.
This is the same as running the command with RUST_LOG=debug environment variable.
--trace
Enable verbose logs with backtrace.
This is the same as running the command with RUST_LOG=trace and RUST_BACKTRACE=1 environment variables.
Check up an account
$ neverest doctor [OPTIONS] [ACCOUNT]
Check up the given account (or the default one if omitted).
This command performs a checkup of the given account. It checks if the configuration is valid, if backend can be created and if sessions work as expected.
Configure an account
$ neverest configure [OPTIONS] [ACCOUNT]
Configure interactively the given account (or the default one if omitted). For example, it can prompt the IMAP password, the IMAP OAuth 2.0 client secret etc.
Options
-r|--reset
Reset the configuration, which means you may be prompted again for passwords or secrets.
Synchronize an account
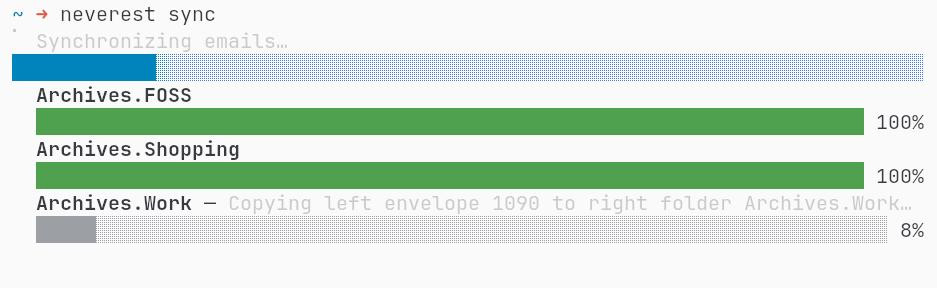
$ neverest sync [OPTIONS] [ACCOUNT]
Synchronizes folders and emails of both left and right backends of the given account (or the default one if omitted).
Options
-d|--dry-run
Run the synchronization without applying any changes.
Instead, a report will be printed to stdout containing all the changes the synchronization plan to do.
-F|--include-folder
Synchronize only specific folders (can be repeated).
Only the given folders will be synchronized (including associated envelopes and messages). Useful when you need to speed up the synchronization process. A good usecase is to synchronize only the INBOX in order to quickly check for new messages.
Overrides the config option folder.filter.
-x|--exclude-folder
Omit specific folders from the synchronization (can be repeated).
The given folders will be excluded from the synchronization (including associated envelopes and messages). Useful when you have heavy folders that you do not want to take care of, or to speed up the synchronization process.
Overrides the config option folder.filter.
-A|--all-folders
Synchronizes all existing folders.
Overrides the config option folder.filter.
Backup & restore an account
The backup and restore features are not yet natively included in Neverest CLI, yet you can manually back up and restore an account if one of its side (left or right) uses the Maildir backend. Let’s take the following example:
[accounts.posteo]
default = true
folder.filter.include = ["INBOX"]

left.backend.type = "maildir"
left.backend.root-dir = "~/Mail/posteo"

right.backend.type = "imap"
right.backend.host = "posteo.de"
right.backend.port = 993
right.backend.login = "clement.douin@posteo.net"
right.backend.passwd.cmd = "pass show posteo"
After running neverest sync, all emails are located in ~/Mail/posteo. You can easily back up your emails by running the following command:
$ tar cvzf posteo-backup-$(date +"%Y-%m-%d").tgz -C ~/Mail posteo
To restore your emails, just run the following:
$ mv ~/Mail/posteo ~/Mail/posteo-old
$ tar xvzf posteo-backup-2024-01-01.tgz -C ~/Mail
Generate man pages
$ neverest manual [OPTIONS] <DIR>
Generate manual pages to a directory.
This command allows you to generate manual pages (following the man page format) to the given directory. If the directory does not exist, it will be created. Any existing man pages will be overriden.
Generate completion scripts
$ neverest completion [OPTIONS] <SHELL>
Print completion script for a shell to stdout.
This command allows you to generate completion script for a given shell. The script is printed to the standard output. If you want to write it to a file, just use unix redirection.
Available shells: bash, elvish, fish, powershell, zsh.
Contributing guide
Thank you for investing your time in contributing to Neverest CLI!
Development
Neverest CLI is written in Rust language. To contribute to the project, you need to install the Rust environment. Here 2 options to set up your development environment:
Using Nix
Neverest CLI relies on the Nix package manager. Starting the development environment is as simple as running nix-shell (or nix develop with flakes feature on), which spawns a shell with everything you need to get started with Neverest CLI: cargo, cargo-watch, rust-bin, rust-analyzer…
# start a nix shell
$ nix-shell

# build the CLI
$ cargo build
Using Rustup
If you do not want to use Nix, you can install and use rustup.
# install rustup
$ curl --proto '=https' --tlsv1.2 -sSf https://sh.rustup.rs | sh

# install toolchain from ./rust-toolchain.toml
$ rustup show

# build the CLI
$ cargo build
A rust-toolchain.toml file is available at the root level of the project, and should be taken by rustup to install the right toolchain and components.
Reporting a bug
A bug tracker is available at https://todo.sr.ht/~soywod/pimalaya.
To report a bug, just send an email at ~soywod/pimalaya@todo.sr.ht.
Try to give a minima:
- OS information from
uname -a - CLI version from
--version - Logs from
--debugor--trace
Proposing a feature or fixing a bug
A mailing list is available at https://lists.sr.ht/~soywod/pimalaya/patches.
To propose a feature or fix a bug, please send a patch at ~soywod/pimalaya@lists.sr.ht.
A patch is just a file containing code diff, like the one generated by the command git diff. Git comes with a command called send-email for this exact purpose of sending emails containing a collection of patches. This guide may help you to configure git properly.
Basically, you need to open your git configuration and add your SMTP credentials:
$ git config --global --edit
[sendemail]
smtpserver = mail.example.org
smtpuser = you@example.org
smtpencryption = ssl
smtpserverport = 465
Discussing
A mailing list is available at https://lists.sr.ht/~soywod/pimalaya.
To discuss about the project, feel free to join the Matrix workspace #pimalaya.neverest or contact me directly @soywod. You can also subscribe or unsubscribe to the mailing list.
FAQ
How different is Neverest CLI from Himalaya CLI?
The Neverest project’s scope is email synchronization.
The Himalaya project’s scope is email management. This scope is really large: creating folders, listing and filtering envelopes, sending messages, but also synchronizing accounts, like Neverest. The main difference is that Himalaya synchronizes folders and emails from a remote source (like IMAP) to a local Maildir instance in order to enable offline support. Neverest is more generic, it synchronizes folders and emails between two sources (local or remote, namely left and right).
If you want to synchronize two sources together, or just backup your emails, Neverest CLI is the best choice.
If you want to manage your emails with optional offline support, Himalaya CLI fits better.
Why using Neverest CLI over OfflineIMAP or mbsync?
OfflineIMAP is a CLI written in Python to synchronize remote IMAP emails with a local Maildir. The project did not receive any update for the past years, and many bugs are in pending state. Plus the synchronization process is really slow.
mbsync is a CLI written in C to synchronize two sources together (either IMAP or Maildir). The project seems still active, but is hard to properly configure.
Neverest CLI is written in Rust, and tries to combine the best of both tools: using a safer language than Python, being as fast as mbsync, easy to configure (thanks to the simple TOML API and the wizard), and benefit from a growing community / ecosystem. By using email-lib, it also prevents reinvention of the wheel. The lib is being used by more and more tools, which will make the lib AND the lib consumers more resilient over time.
How can I debug Neverest CLI?
The simplest way is to use --debug and --trace arguments.
The advanced way is based on environment variables:
RUST_LOG=<level>: determine the log level filter, can be one ofoff,error,warn,info,debugandtrace.RUST_SPANTRACE=1: enables the spantrace (a span represent periods of time in which a program was executing in a particular context).RUST_BACKTRACE=1: enables the error backtrace.RUST_BACKTRACE=full: enables the full error backtrace, which include source lines where the error originated from.
Logs are written to the stderr, which means that you can redirect them easily to a file:
RUST_LOG=debug neverest 2>/tmp/neverest.log
How the wizard discovers IMAP config?
All the lookup mechanisms use the email address domain as base for the lookup. It is heavily inspired from the Thunderbird Autoconfiguration protocol. For example, for the email address test@example.com, the lookup is performed as (in this order):
- check for
autoconfig.example.com - look up of
example.comin the ISPDB (the Thunderbird central database) - look up
MX example.comin DNS, and formx1.mail.hoster.com, look uphoster.comin the ISPDB - look up
SRV example.comin DNS - try to guess (
imap.example.com,smtp.example.com…)
Feel free to send any suggestion at ~soywod/pimalaya@lists.sr.ht.